Showing posts with label printing tutorials. Show all posts
Showing posts with label printing tutorials. Show all posts
Monday, November 5, 2012
Monoprint tutorials
This is another video from Double Elephant Print Workshop. In this one, Simon Ripley presents three methods of making monoprints.
Do you have a favorite printmaking tutorial? Let us know!

Friday, November 2, 2012
Foilography Printmaking

Thursday, November 1, 2012
Collograph Variety
Following our post where we showed the collograph demo by Printsy member Lynn Bailey, in this video, she reveals some of the great variety which can be acheived by inking a single plate:
Lynn is part of Double Elephant Print Workshop. You can find other printmaking demonstration videos by Lynn's colleagues here.
Lynn is part of Double Elephant Print Workshop. You can find other printmaking demonstration videos by Lynn's colleagues here.
Thursday, November 10, 2011
Tutorial: Coarse Aquatint
Aquatint is a technique used in copper and zinc plate intaglio printmaking to create tone. In a traditional studio, this is frequently done using a fine powdered resin which forms an acid-resistant dot cover on the plate, applied using a dedicated aquatint box. You get a reliably even tone throughout the image. In safety oriented studios, some artists substitute the powdered resin with spray enamel or spray paint.
Etchers who've worked exclusively with aluminium plates may not be familiar with this process because aluminium is 'self aquatinting,' in that if you place a large exposed surface of aluminium in the acid, it will not bite out the entire surface (thus creating an open bite) but rather bite out the metal in a grainy matrix which can hold ink.
Note: this tutorial has been written for those who have previously used some kind of aquatint, rather than for the complete beginner. However, if you belong to the latter category and nevertheless want to read on and find yourself confused, please do ask in the comments!
As the name suggests, this tutorial covers some aspects of the application of, and results that can be achieved with, a coarse aquatint. It's different from a 'fine aquatint' that the tone is more irregular and broken, and you can apply it without having to build yourself an aquatint box.
You need:
• Respirator / dust mask
• Lump resin / aquatint ground (this may be called something different depending on your location)
• Ziplock/plastic bag
• Wine bottle (empty) or a rolling pin which you never plan on using for food preparation again
• Jar
• Cheesecloth
• Old newspaper
• Heat gun
0) Powdered resin is bad for your health and loves to stick in your lungs. If possible, invest in a respirator, but at the very least wear a dust mask. Work somewhere like the garage or shed, where wind isn't going to blow the powder around, but which is away from fabrics and cushions. Cover your working surface with plenty of newspaper for easy clean up afterwards. When heating the resin, work in a very well ventilated area.

1) Put enough resin to fill your jar into a layer or two of ziplock bags.
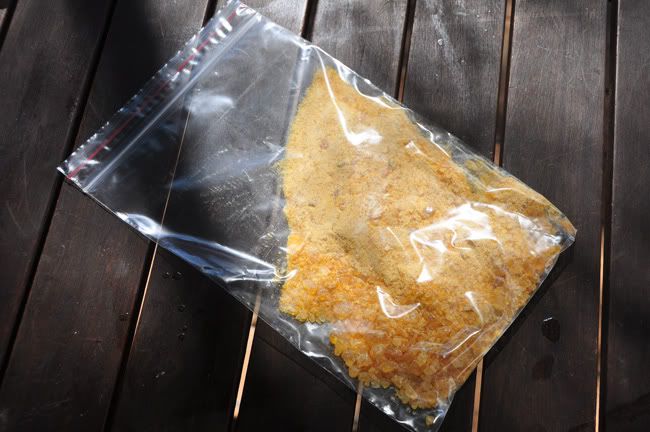
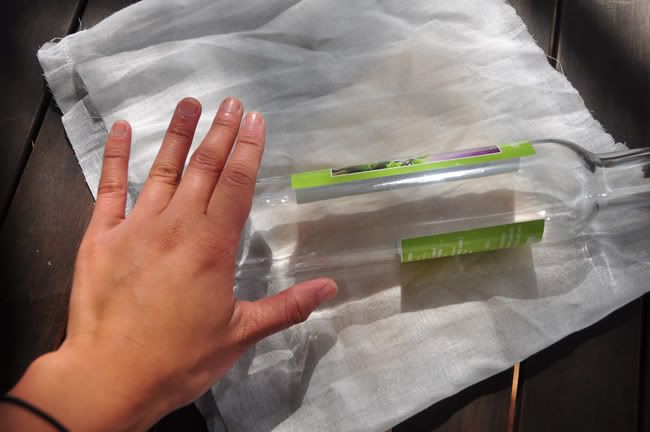
2) Cover it with a cloth, and using your wine bottle/rolling pin, crush the resin into a powder.
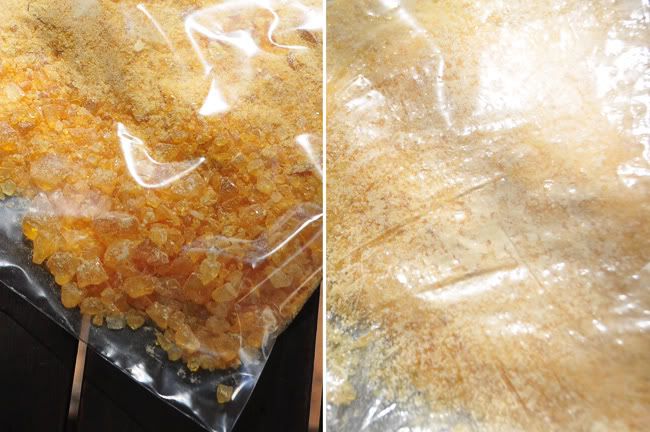
Before rolling and after rolling:
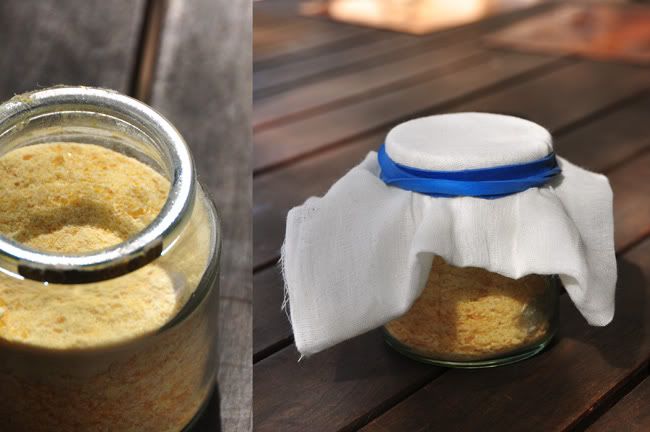
3) Pour the powder into the jar. Cover it with 2-5 layers of cheesecloth (depending on the size of the holes in the cheesecloth and how much powder you'd like to escape) and secure with a rubber band.
4) Place your degreased plate (resin doesn't stick to oil!) on the newspaper. Hold the jar over it and tap to let the powder fall lightly on the plate.
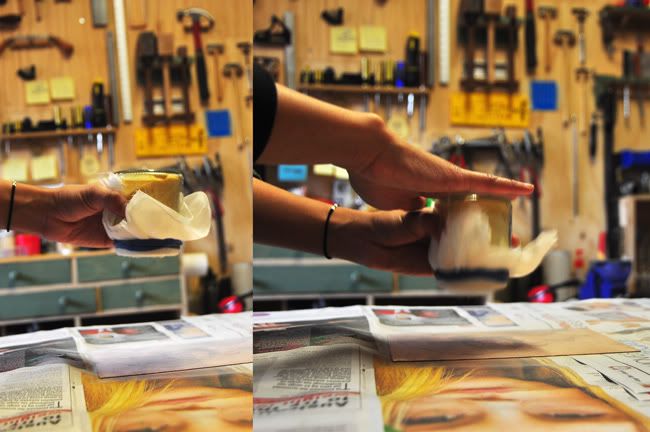
4.1) Remember that resin expands when heated, so don't overdo it or the acid will have nowhere to bite.
4.2) If you need to cover large areas with tone, you are more likely to get an even coverage if you hold the jar up high to lightly work larger areas of the image instead of trying to do small bits at a time. Note that this will also cause the powder to float about more, so protect your clothing and workspace extra carefully.
4.3) The powder is not attached to the plate at this stage. Be careful not to breathe on it or to let your movements disturb it.
A corner covered in resin:
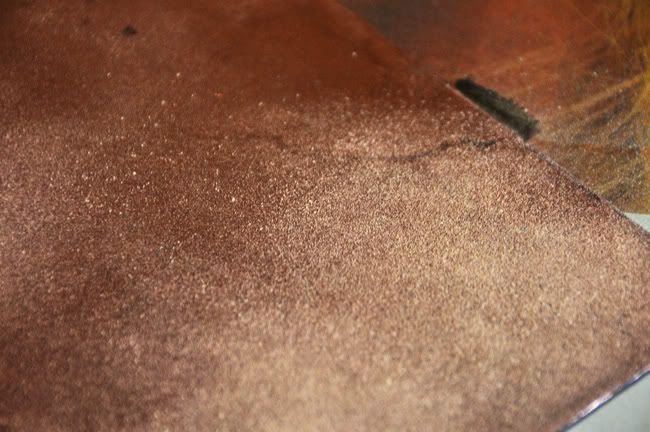
5) Carefully heat the resin from underneath with a heat gun. You'll know it's attached to the plate when it becomes transparent. Don't inhale the fumes.
6) After the plate has cooled, you will be ready to proceed in the same way as any other aquatint: block out the white areas; etch; clean off with methylated spirits; proof!
It takes a while to get the hang of exactly how much powder coverage there needs to be for the effect you're after. It is possible to get quite even results:
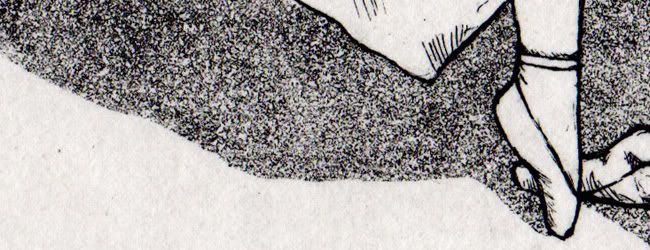
Or you could embrace the irregularity, in which case you get something like this:
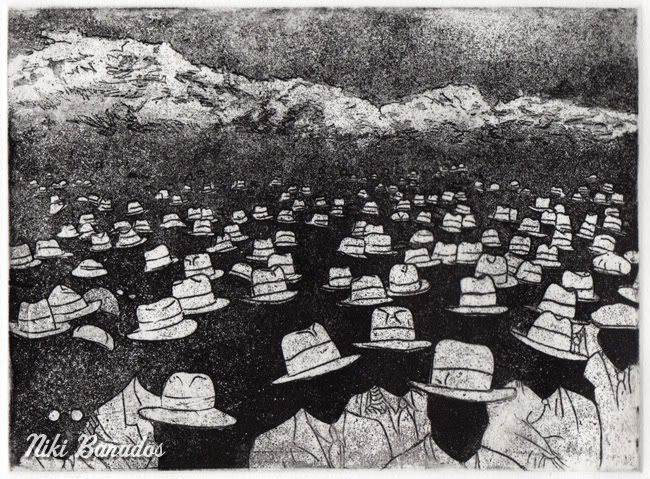
(Work is entitled Gathering in the Domain, 2011)
Etchers who've worked exclusively with aluminium plates may not be familiar with this process because aluminium is 'self aquatinting,' in that if you place a large exposed surface of aluminium in the acid, it will not bite out the entire surface (thus creating an open bite) but rather bite out the metal in a grainy matrix which can hold ink.
Note: this tutorial has been written for those who have previously used some kind of aquatint, rather than for the complete beginner. However, if you belong to the latter category and nevertheless want to read on and find yourself confused, please do ask in the comments!
As the name suggests, this tutorial covers some aspects of the application of, and results that can be achieved with, a coarse aquatint. It's different from a 'fine aquatint' that the tone is more irregular and broken, and you can apply it without having to build yourself an aquatint box.
You need:
• Respirator / dust mask
• Lump resin / aquatint ground (this may be called something different depending on your location)
• Ziplock/plastic bag
• Wine bottle (empty) or a rolling pin which you never plan on using for food preparation again
• Jar
• Cheesecloth
• Old newspaper
• Heat gun
0) Powdered resin is bad for your health and loves to stick in your lungs. If possible, invest in a respirator, but at the very least wear a dust mask. Work somewhere like the garage or shed, where wind isn't going to blow the powder around, but which is away from fabrics and cushions. Cover your working surface with plenty of newspaper for easy clean up afterwards. When heating the resin, work in a very well ventilated area.

1) Put enough resin to fill your jar into a layer or two of ziplock bags.
2) Cover it with a cloth, and using your wine bottle/rolling pin, crush the resin into a powder.
Before rolling and after rolling:
3) Pour the powder into the jar. Cover it with 2-5 layers of cheesecloth (depending on the size of the holes in the cheesecloth and how much powder you'd like to escape) and secure with a rubber band.
4) Place your degreased plate (resin doesn't stick to oil!) on the newspaper. Hold the jar over it and tap to let the powder fall lightly on the plate.
4.1) Remember that resin expands when heated, so don't overdo it or the acid will have nowhere to bite.
4.2) If you need to cover large areas with tone, you are more likely to get an even coverage if you hold the jar up high to lightly work larger areas of the image instead of trying to do small bits at a time. Note that this will also cause the powder to float about more, so protect your clothing and workspace extra carefully.
4.3) The powder is not attached to the plate at this stage. Be careful not to breathe on it or to let your movements disturb it.
A corner covered in resin:
5) Carefully heat the resin from underneath with a heat gun. You'll know it's attached to the plate when it becomes transparent. Don't inhale the fumes.
6) After the plate has cooled, you will be ready to proceed in the same way as any other aquatint: block out the white areas; etch; clean off with methylated spirits; proof!
It takes a while to get the hang of exactly how much powder coverage there needs to be for the effect you're after. It is possible to get quite even results:
Or you could embrace the irregularity, in which case you get something like this:
(Work is entitled Gathering in the Domain, 2011)
Sunday, August 7, 2011
Interview with Mirka Hokkanen of FinnfactorArts

Biography
I was born and raised in Finland, which affects a lot of my choices for colors and themes as an artist. I moved to Rockford, Illinois in 1998 to go to college and finished school in Dallas Texas with an MFA in 2006. I have taught classes at all levels from universities to my garage and now work as a full time artist, illustrator and crafts person. My husband is in the Army, which is a challenge with constant moving around. A couple of years ago we were in Georgia, then in Dupont WA, and now we live in southwest Germany.
Why Printmaking?
Since I could hold a crayon, I have always drawn and when I took a printmaking class my first year in college I was hooked. Making prints are like making a glorious drawing and instead of getting only one you get as many as you can bare to print. I love that more people can appreciate my work because there is more of it to go around and I can sell it more affordably than an original drawing or painting.

What is your favorite print medium and why?
My favorite has always been etching, I think because it is the closest to drawing and less cumbersome than lithographs. The deep blacks, variety of mark making and the ink that actually sits in relief on the paper are irresistible. Relief printing would be a close second. I like the manual work of carving into a plate.
How long have you been printing and how has your work evolved?
I have been printing since 1998. The main focus has always been animals and nature with very little deviation. My work has gone through two major themes. The first series was about factory farming and its hazards to our health, the animals and our earth. Imagine lots of pictures of cows, chickens and pigs. Now I am working on a whimsical series of animals that are being displaced by sprawling suburbs. In the series the animals are spying on us and plotting how to take their land back. Imagine lots of woodland creatures in suspicious activities.
What or Who influences your work?
The variety of creatures that God has placed on this earth is astounding to me. There are so many colors, patterns, shapes and sizes out there to discover. Nature itself is my biggest inspiration. Outside of nature, Instead of a specific artist or a movement, I am drawn to subject matter. I have a box where I collect magazine clippings, cards and paraphernalia of things that spark my interest. A lot of time it is art with animals in it, work that has very interesting lines, or earthy color combinations. Out of all artists, Joseph Cornell has always been my favorite. I like vintage looking things that look like they are in some state or disrepair or decay.

How do your promote your work?
This is always a challenge with constant moving. Whenever we move, I do my best to get to know the art community. My work gets promoted in person through exhibitions that I am in and though craft fairs. Through those I get featured in newspaper articles and recently even a TV interview. Online, I have a website, blog, Etsy store, twitter and send out new and upcoming events to an email list. Every once in a while I’ll do something else to spice things up, but so far referrals from others and word of mouth seems to work the best for me.
Any good printing tips or funny printing stories (or both??)
You can find lots of printing tips on my blog where I post videos and how-to’s. Something silly- I was just doing a visiting artist residency in San Antonio, and made some copper plate etchings there. They had two large vertical tanks for etching, so I went ahead business as usual and etched three plates over the course of a week. At the end of the week, I actually looked down and realized that one of the tanks was for the ferric chloride and the other one was meant to be a rinse for plates before going to the facet. For the whole time, I had been etching my plates in the rinse bath, but apparently it was so used, that it had enough ferric in it to etch my plates just fine… I was a little embarrassed, since I was supposed to be the etching expert. But no one noticed, since I was there by myself for most of the time.

Subscribe to:
Posts (Atom)